Past Due Update Part 2: French Drain and Shed Install

Now we’re getting to the good stuff. The French drain is of course taking longer than it should, I need to buy more stones to use around the French drain pipe that is going in the ground. But one of the benefits of all this is that I’m digging out a decent amount of dirt that’s being replaced with the hollow pipe and rock, and so once again I’ve come up with a purpose for this which involves yet another yard project – the side bed.

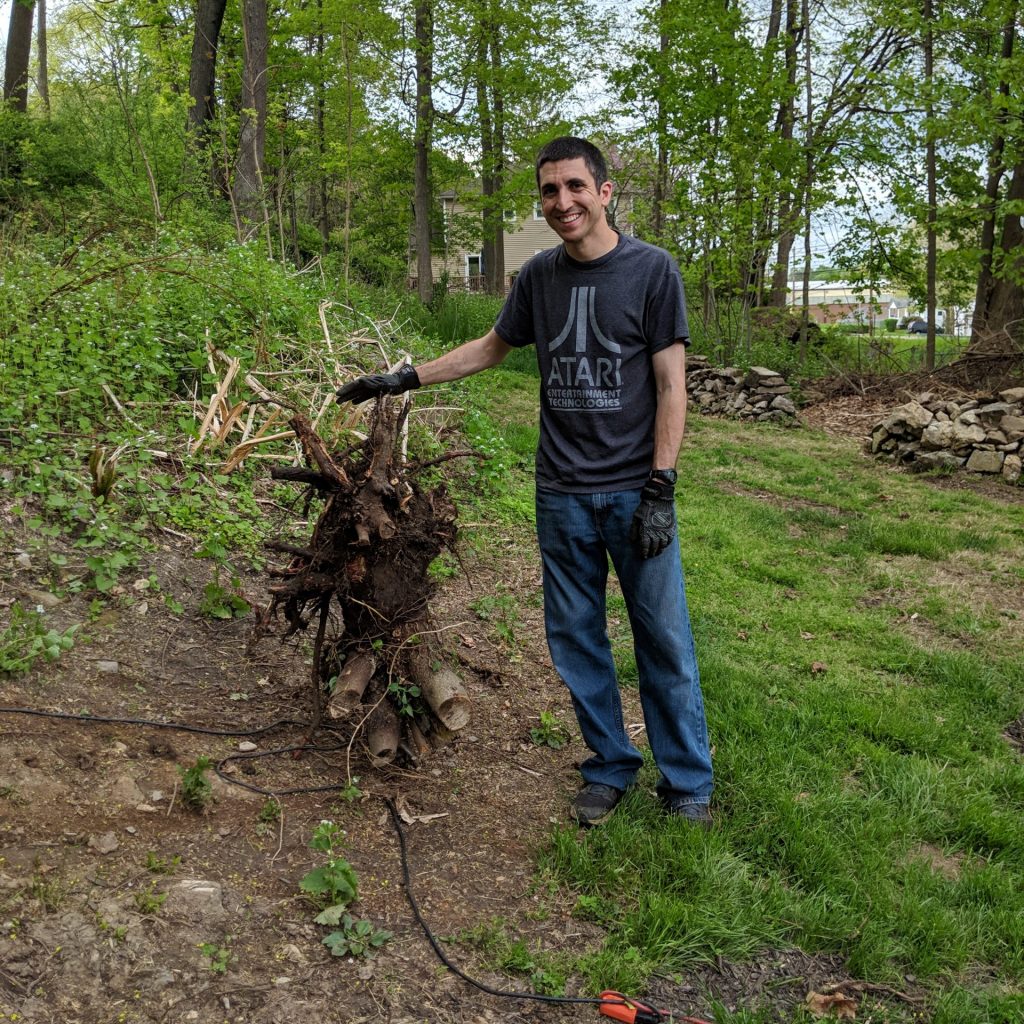
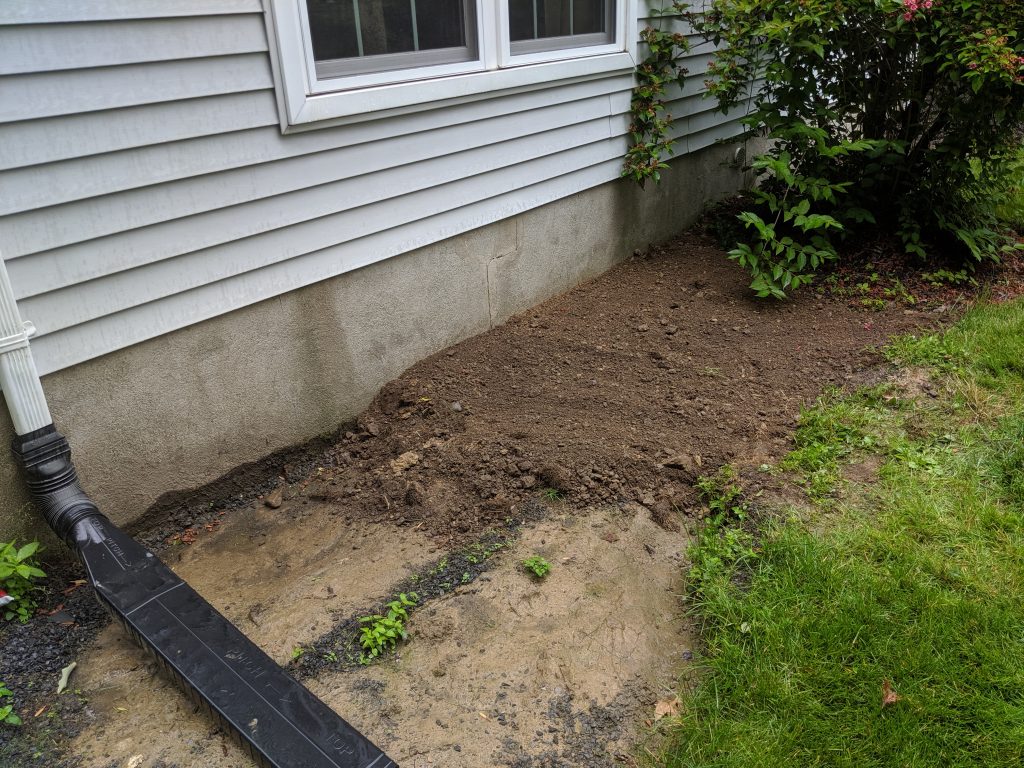
You see about a year or two ago, we ripped out some old buses along the other side of our house closest to Bob Neighbor. There is a tree bush thing that we kept, but where the bigger unwieldy bushes were those are now gone and I started to replace it with empty mulch and grass. I got about halfway done before the project was put on pause because, well, summer was over. But now I can take that dirt that I’m removing for the French drain and put it here in the side yard.

June 16, 2019

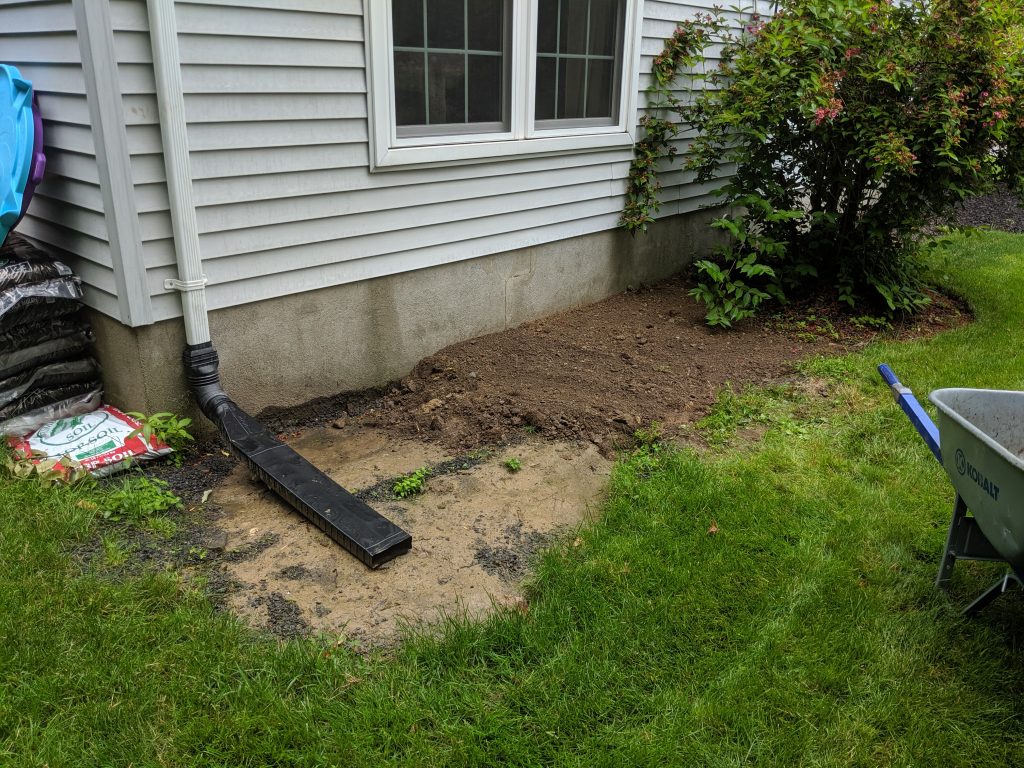
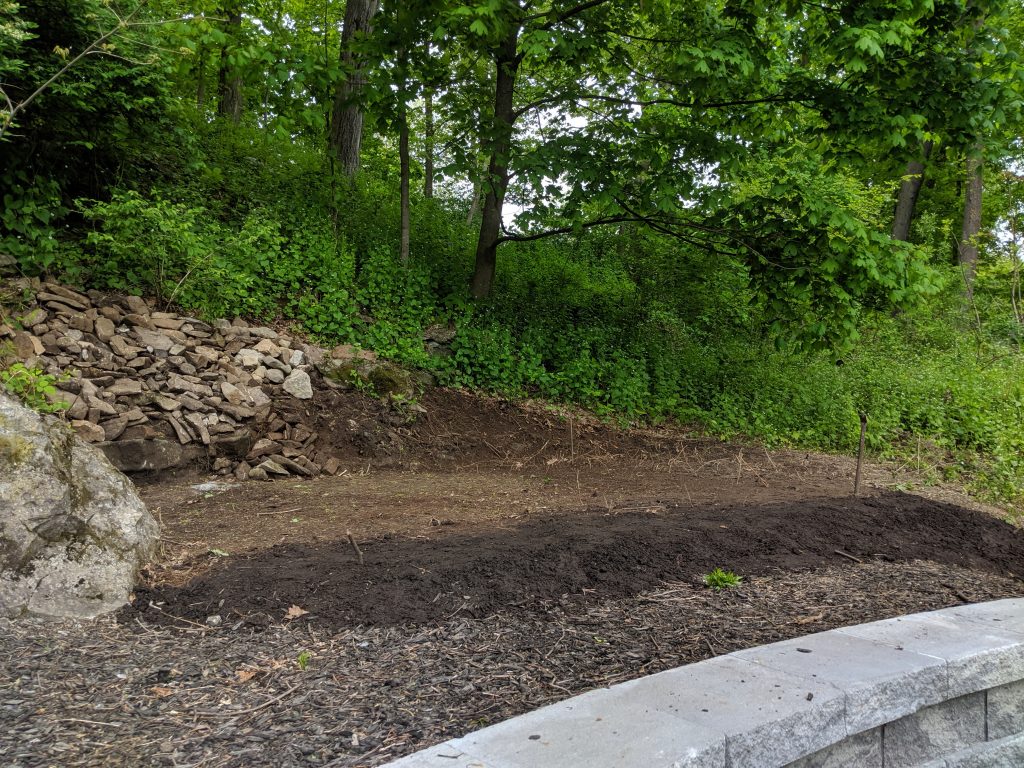
Why do I need dirt there? Because once again this was filed with weed barrier and those little gray stones. I was able to get nearly all of them up on this portion but that left the grass in my yard a good two to four inches above where the stones were. And, more importantly, the water would actually run into the foundation, not away from it, which would be really really bad over time. So I needed to build this up, and pitch it slightly away from the house.

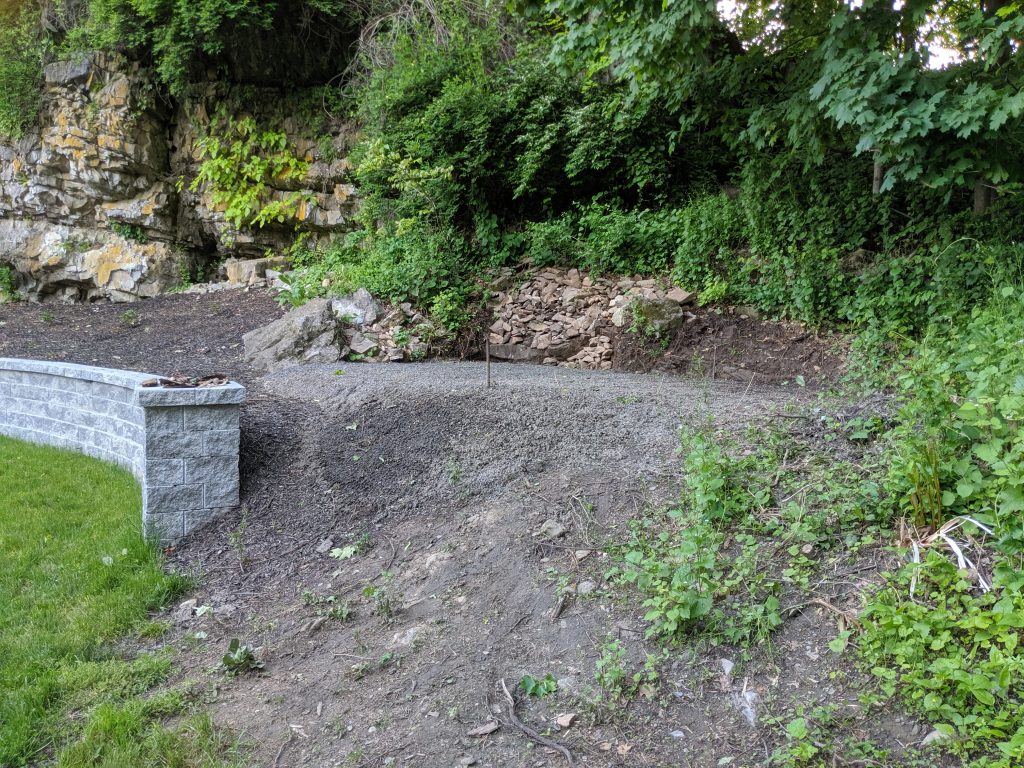
And if you’re wondering what happened to the stone that was here, it went behind the retaining wall to help level out the area where the shed is going.

June 16, 2019 – It was very satisfying to dump the dirt and start to pitch the side of the house. Almost looks like I knew I was going to do this all along!

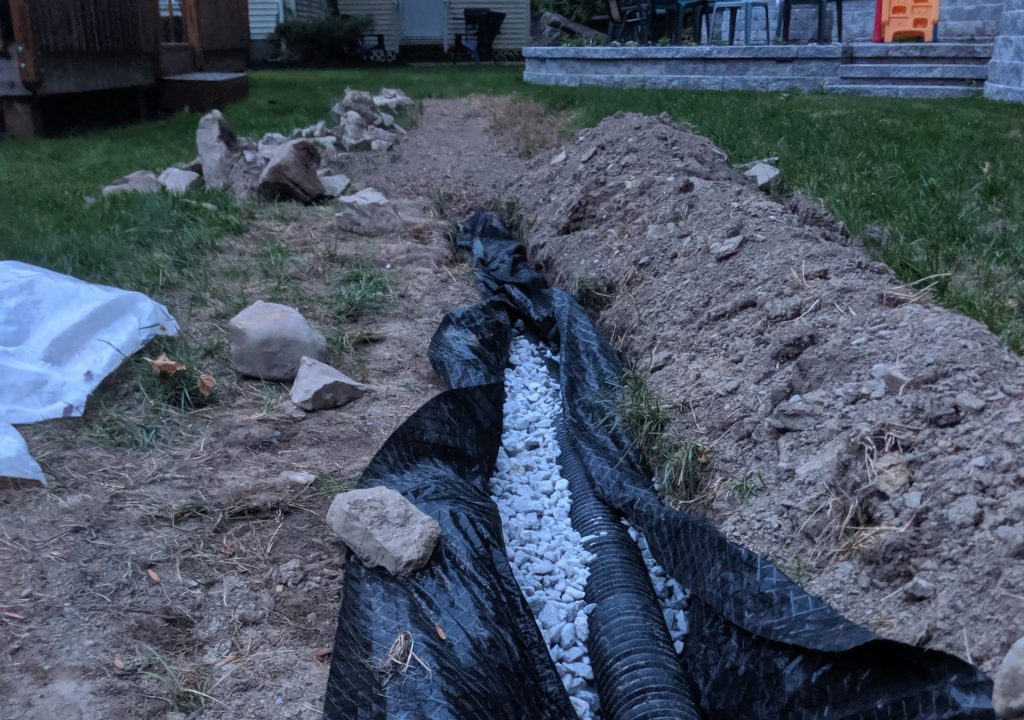
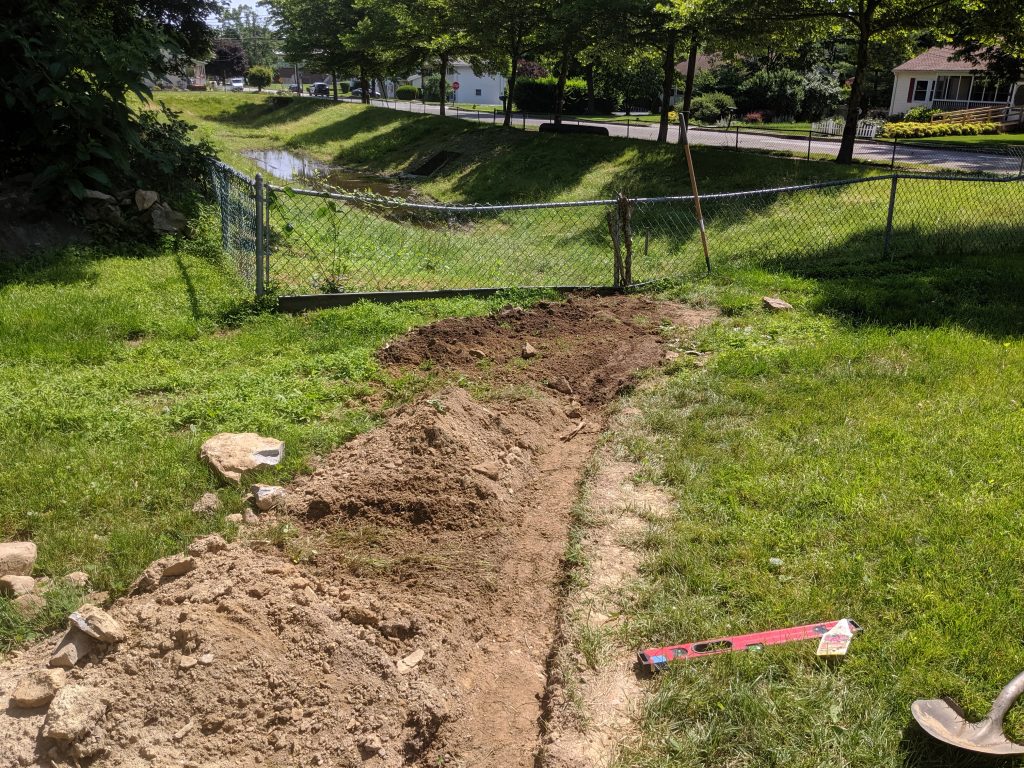
Next I covered up as much of the French drain as I could, and started to seed over it. This is only about a third of the French drain.

June 17, 2019

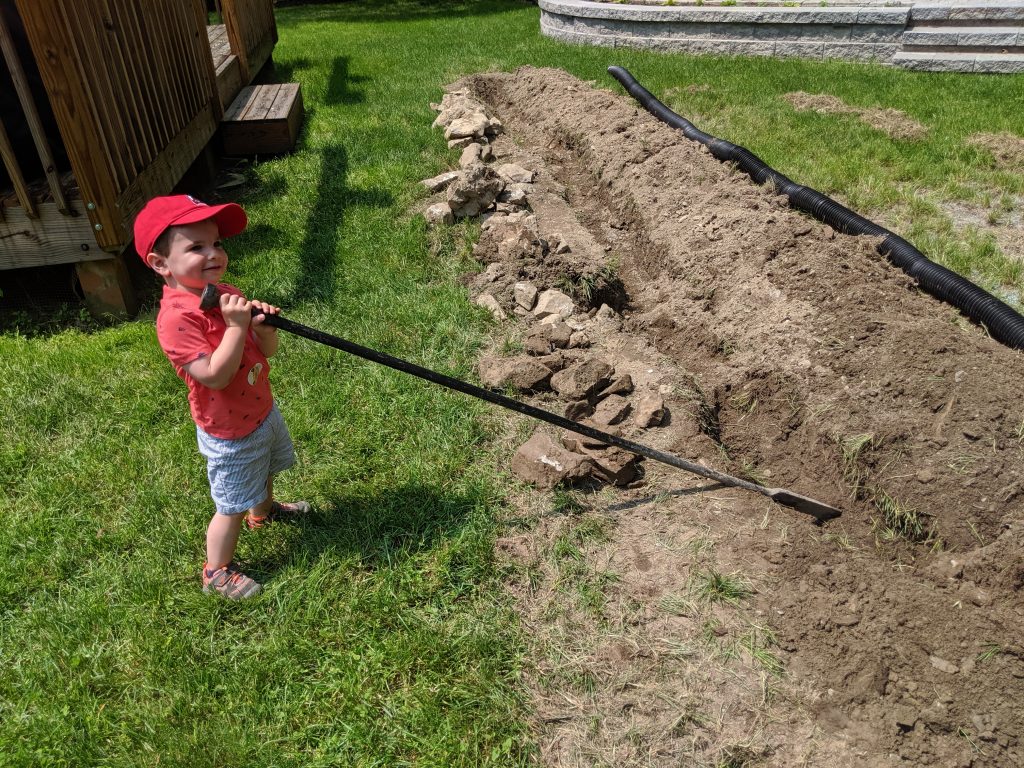
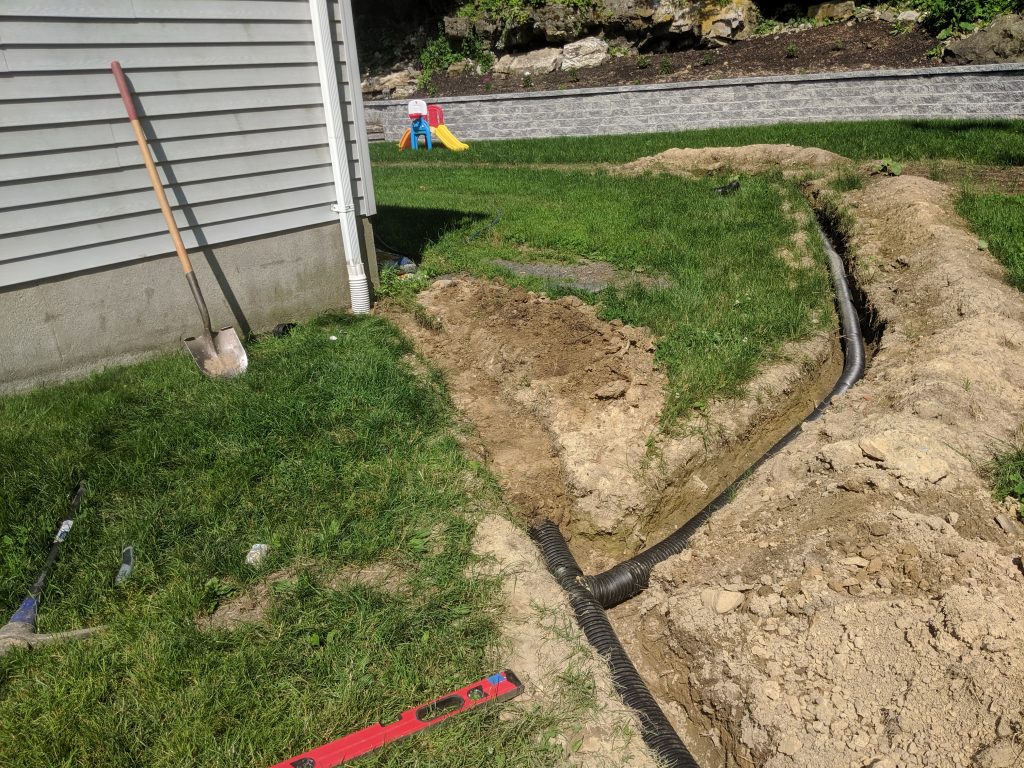
The following week I finished digging the French drain out to the side of the house, where it will connect to the gutter drain pipe. Let me explain…

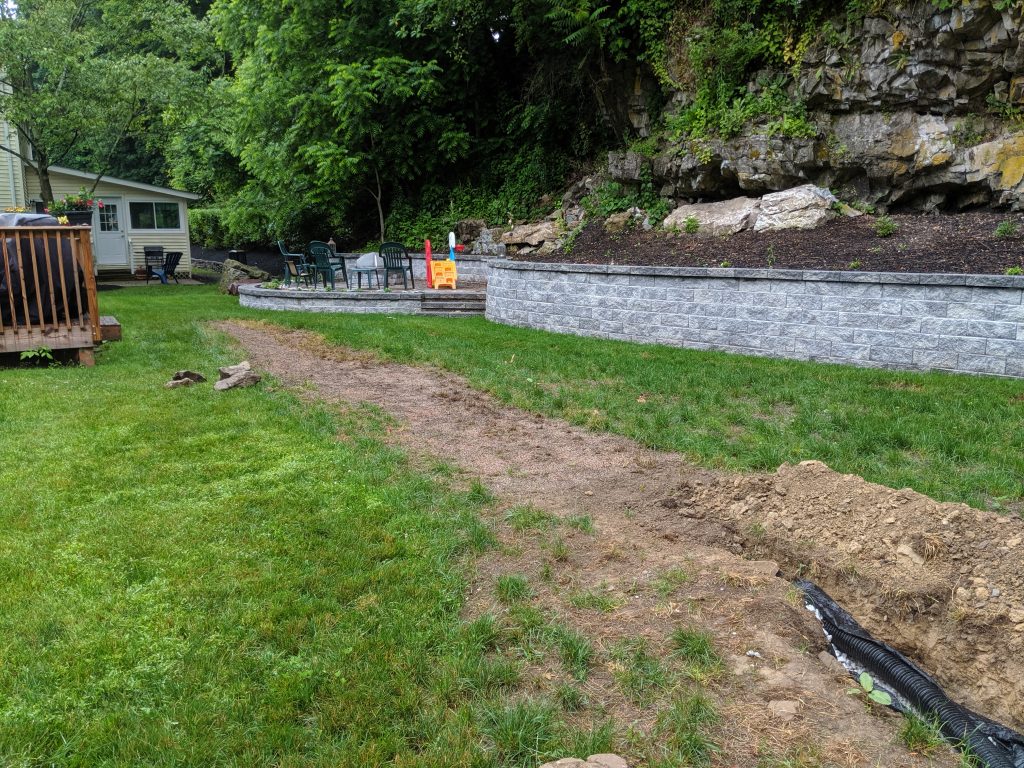
You see when I first moved into my house we noticed that the side of our house that borders town property, where they have a drainage ditch dug out, seemed to be eroding into aforementioned ditch. Half of the gutters on my house are emptying down this slope into the drainage ditch. And so no lie it was almost a foot lower than it probably should have been. I installed a drain pipe from the front gutters to the drainage ditch very early on. I had bought enough pipe to run a second, but just never got around to it. It wasn’t as important because of how the gutters were run at my house (I’ll explain in a moment), but I felt like should still be done for the sake of it’s the right thing to do.

The gutter on the front of my house splits drainage on each side, half to Bob Neighbor’s side and the other half empties into the front garage gutter. It’s this front garage gutter that I originally piped to the drainage ditch. The back gutter on my house all drains to Bob Neighbor’s side. So only the back garage gutter would get drained out.

Okay, with that explanation out of the way, since I was going to be running the French drain out to the drainage ditch, I might as well connect in that back garage gutter. Besides, if I had my way, if I were to ever replace my gutters I’d try to run all water down the side into the drainage ditch and have none of it run to the Bob Neighbor side, since that side gets swampy. I’m not sure gutters could handle the volume of water though.

June 22, 2019

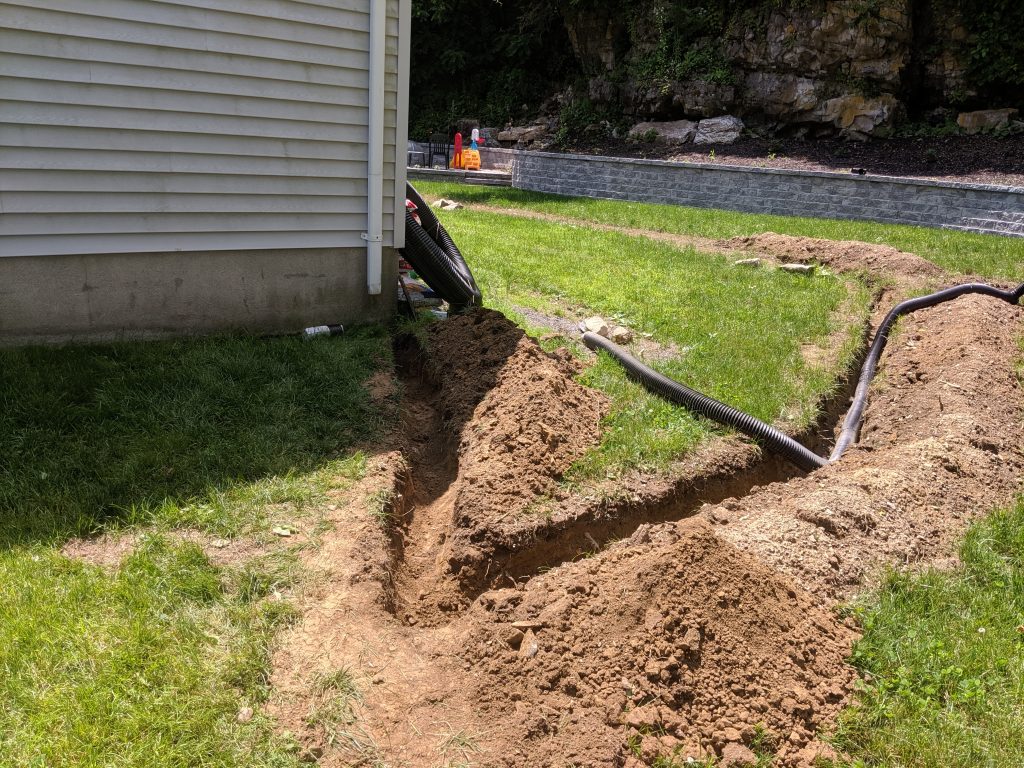
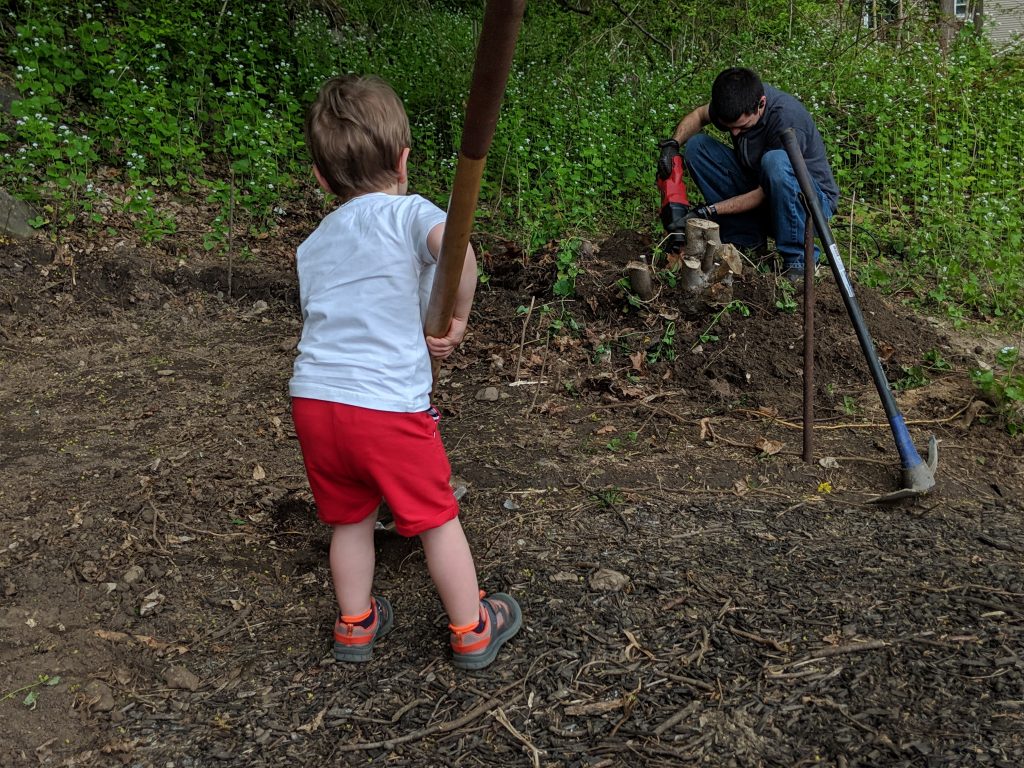
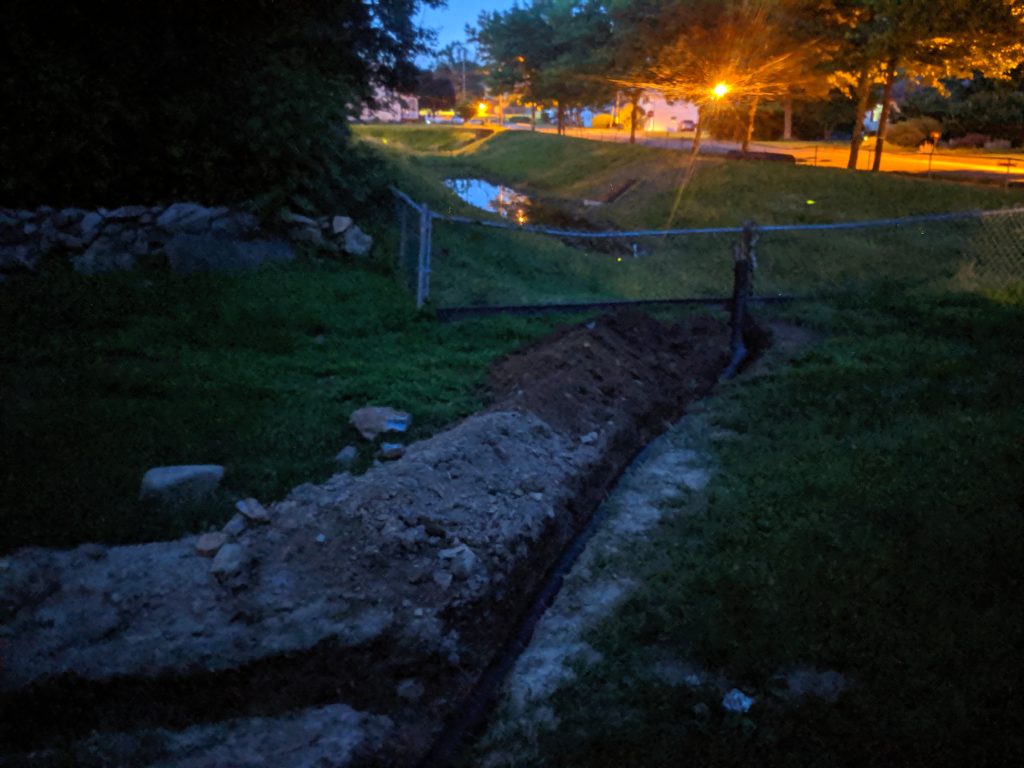
I still needed to dig out the remaining half to the drainage ditch. Once done, I then test fit with the pipe to ensure there’s enough of a pitch so water drains out went relatively well, but some minor alterations were needed. I was doing this work late at night on a Thursday, because on Friday, the shed was about to be installed, and I didn’t want the shed folk to have to jump over a ditch where I was running pipe.

June 27, 2019

On Friday, I finished cutting the pipe, added the T to connect the French drain portion in, again, tested the pitch, and began the processes of replacing the dirt on top of this. Note that because this is just drain pipe with no holes, the pipe goes right into the ground, no need to add drainage rocks like the French drain pipe. Notice in the pictures that the second half of the French drain remains uncovered.

June 28, 2019 – This was all very exciting, not only adding in the “T” to connect the French drain to the gutter drain pipe, but then starting to cover over it with dirt, as if the project were nearing completion!
June 28, 2019

And now the shed begins installation! This may have been some of the most exciting work that I’ve had done since we got the new windows in our house. I was essentially buying space. And I knew that as time passed I was going to need it, or else one of us was going to lose their parking spot in the garage!

June 29, 2019 – This was like Christmas morning for me…
June 29, 2019 – They moved fast. The shed is installed on a steel frame on the bottom, which will certainly help with longevity since none of the wood makes ground contact.
June 29, 2019
June 29, 2019 – Don’t worry, we’ll get around to clearing out the green in front of the shed… eventually.
June 29, 2019

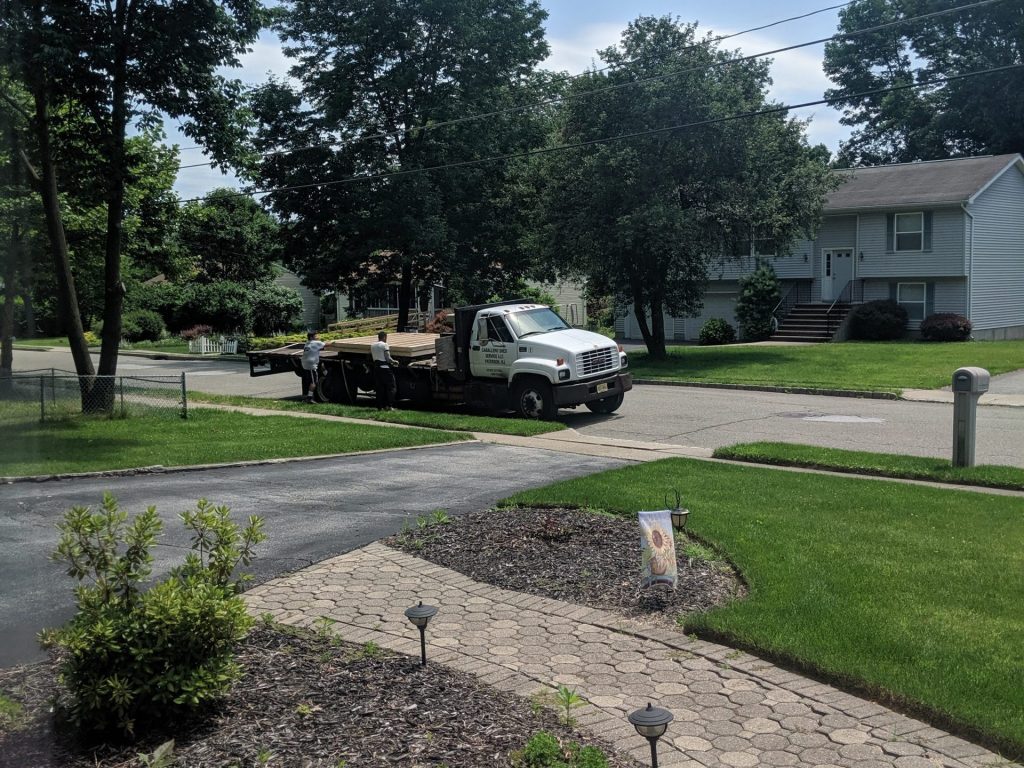
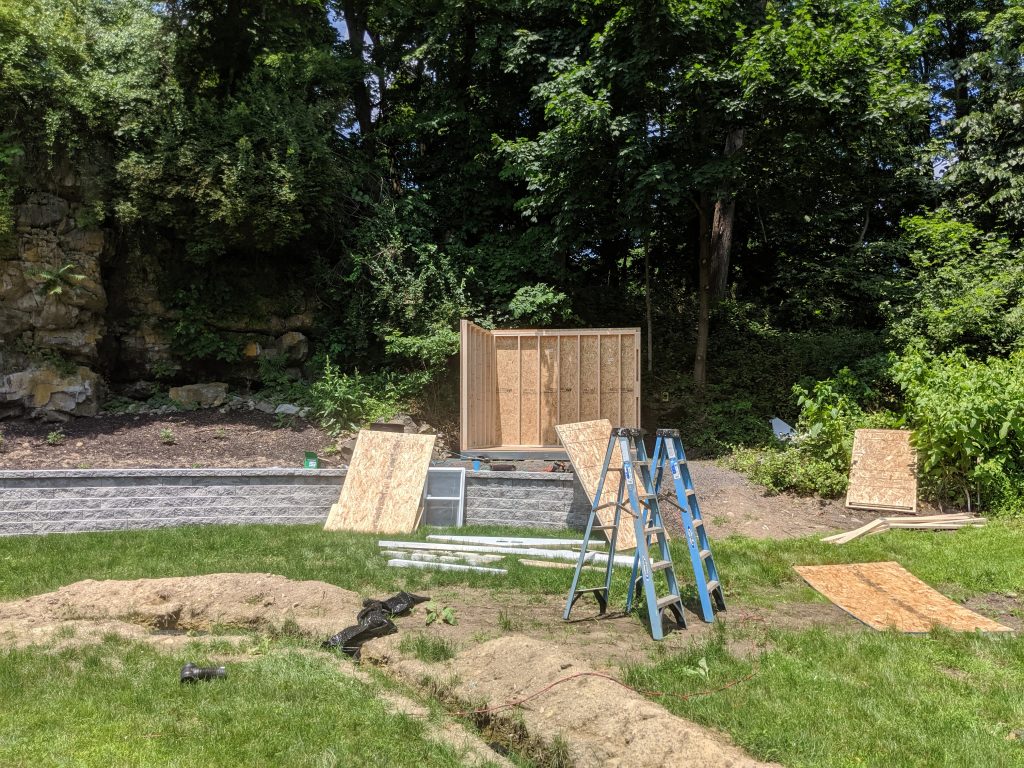
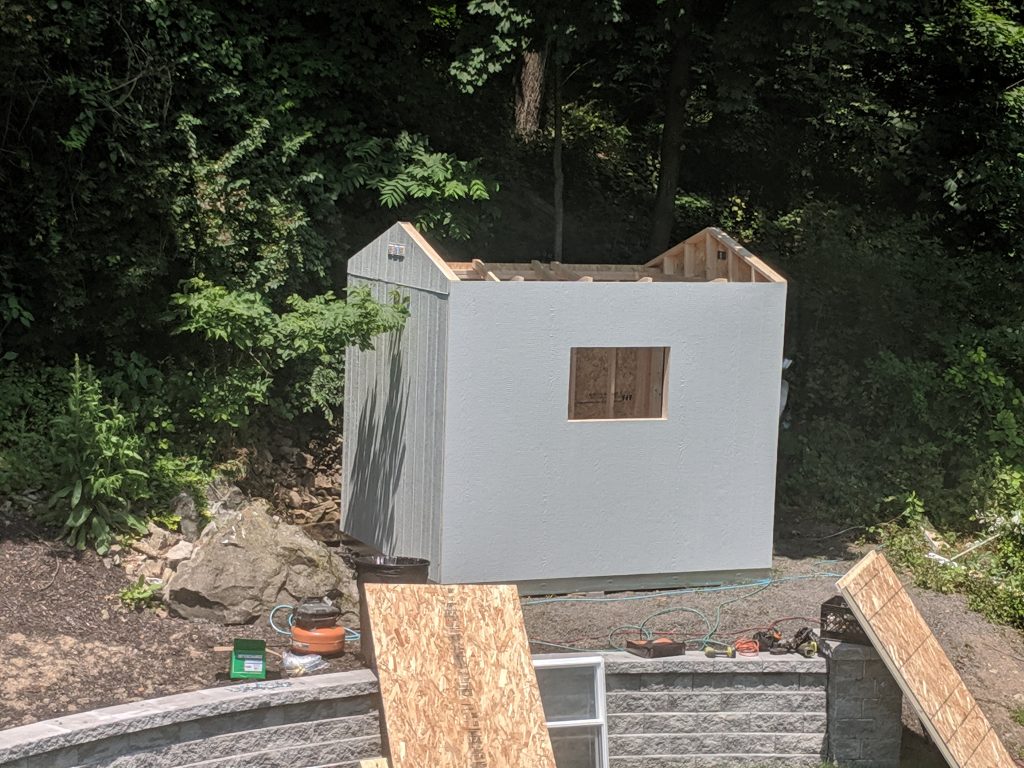
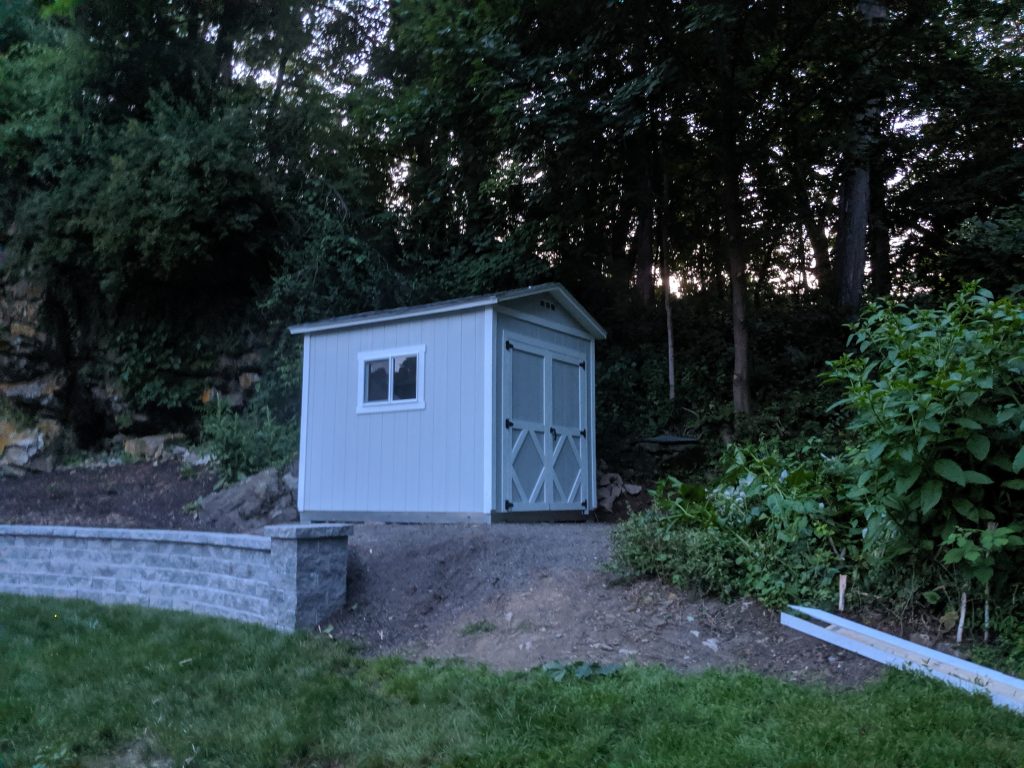
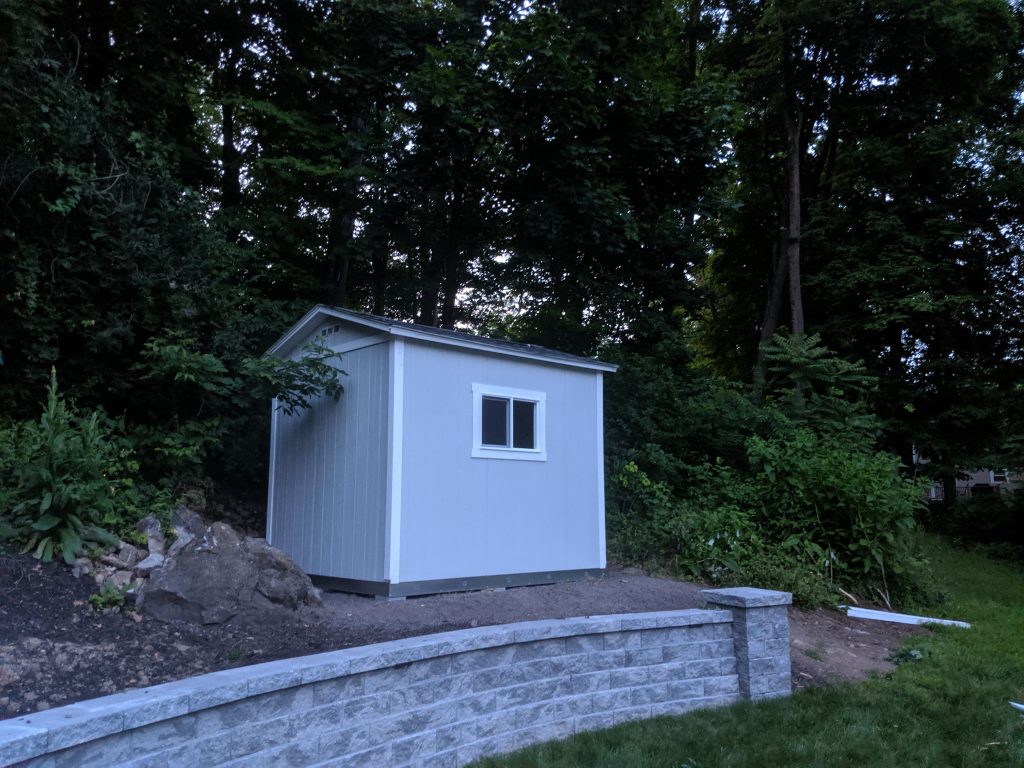
They did have some issues where they needed to cut wood to make it work, for some reason. Everything came from the factory with everything pre-cut and ready to assemble. But they managed to fix the issues and got everything done within a day! I now had an extra 80 square feet (plus a little more – more on that later) of storage.

And on that note we end Part 2. Part 3 will go over getting electricity up to the shed, and then after an intermission while we went to Disney World, more work on the side yard, and completion of the French drain (finally!). There will be a Part 4 where I add some finishing touches to the shed as well!

Past Due Update Part 1: Shed Leveling and French Drain Start

Soooo, I’m way past this update. The last post I really had was about the shed, and how I was working on clearing out the spot for it. I’m happy to report, that was about three projects ago, and all went well. I’ll touch on the other projects shortly, but here’s how the Shed all went down.

From start to finish, this project took 7 months. Why you might ask? Well, because besides leveling and clearing the site for the shed, roped in with this project ended up being 4 other projects:

  • French drain
  • Gutter drain
  • Electrical work
  • Side of house bed and mulch

I’ll get into each of those in a bit, and in fact I’ll split this up into three or four parts. But I’ll start with some remaining shed leveling and the French drain

First, the site you saw in my previous post we had just ripped out the big rock. I needed to finish some of the leveling and rip out some old stumps. The stump wasn’t going to be in the way of the shed, but would get in the way of getting into and out of the shed, so it had to go.

May 2, 2019 – Connor helps dig while I cut the roots of the old stump in the ground.
May 2, 2019 – That’s a big stump…

I also needed some additional dirt for the ground (the darker dirt below), and I used rocks that were “excavated” to make a pretend retaining wall for the area that was dug out.

May 9, 2019 – Pretty level and wide enough base for the 8′ x 10′ shed.

Then add some stone to make the space for the foundation as solid as I could, plus give me a little extra room for leveling. This, also, has the added benefit of me using the pile of stone that Jen and I collected and stored behind the garage. The stone was originally used in the flower beds around the house.

May 21, 2019 – And now with the stone that we had collected over the years from the old flower beds around the house.

Now while all this was going on, I decided, I’m not tired of digging yet. You see after clearing this whole site for the shed, it was going to be some time before the shed was actually manufactured and subsequently installed. And I had some other plans.

The French Drain – The Beginning

A French drain is to help drainage in your yard. Due to a combination of things, including poor soil, compacted soil from when they built my retaining wall, and an excessively wet summer after the wall was built, we had a lot of water pooling up in our back yard. This really hurt the grass we were trying to grow. So step 1, till the yard a bit, and break up the dirt.

June 1, 2019 – Yes, Connor is using his trike as a tiller .

Step 2, start to dig up a channel to lay the french drain pipe.

June 2, 2019 – That tool probably weighed as much as Connor, if not more. It’s great fro getting under rocks and prying them up. The MacInLaws call it “The Persuader.” It’s a very accurate term.

Now this had an unintended benefit – one, I’ll have extra dirt as the french drain will displace some of the dirt that I’m digging up. I can use this dirt to fill in the side of the house where it’s a little low and finish the bed there. And the rocks that come up can be used to complete both the rock wall I have by the town’s fence and the wall of dirt I created by the shed.

Next, lay some weed barrier down, put down a little stone (which I had to buy – I wanted larger stone that would allow better water flow than the small stone I just used as a base for the shed), lay the French drain pipe, and fill with stone, cover with the weed barrier, and finally cover over with dirt.

That French drain pipe is essentially black drain pipe with pre-made holes throughout to let the water in. The theory is the water that goes on top of the ground seeps in to the French drain cavity that was just created, through the rocks, and into the pipe. The pipe has a slight grade to it was well to drain the water out.

June 15, 2019 – The back quarter of the French drain is now covered in dirt. The second quarter is still uncovered for now. Need more rock…
June 11, 2019 – Connor is helping me to put down stone at the bottom of the French drain.

Of course nothing is ever easy – there was a lot of rock to move, and some of it was a bit stubborn. In fact in some places I had to dig from side to side a couple of feet to get to the other side of some of the rock in order to get the rock out of the ground. I wanted as straight a shot with the pipe as possible.

Alright, so that’s it for Part 1, where we went from the beginning of May to mid June. Remember, this is mostly only happening on the weekends. In Part 2, I’ll go over the next phase of the French drain, the gutter drain, the side bed, and the shed installation – which all runs from mid June to the end of June, so things start to pick up!

YAHIP – The Shed

YAHIP is a catchy term, isn’t it? Sounds like a great .com site, with like memes or something else catchy on it. But it actually stands for something much, much worse: Yet Another Home Improvement Project.

So now that I’m with child – that sounds wrong, I’m not pregnant, although that would make me pretty rich…

But anyway, now that I have a child, I’ve come to realize that despite my best efforts, he will always have more things than I can store in my home. And when it comes to outside things, I said to Jen that we need to find places to store outside things before we get them. And I very much lost that battle. The stuff came and I couldn’t do a thing about it!

So I started working on a new project at home, “The Shed.”

Sounds like a Dharma Station… The Shed…

I just made that in Photoshop. That’s actually pretty awesome and I’m going to have to get that printed and put on the shed.

ANYWAY!

So last summer we got a retaining wall put up in our backyard. The reason – the backyard was so overgrown and could not be maintained in it’s current condition. We wanted to make it look nice, but couldn’t keep the weeds out. Plus, by putting in the retaining wall, we got some more yard out of it, and I convinced Jen to add a patio and firepit.

I had one small complaint – I wanted to get more yard out of it then we did. However, with that being said, the people we had come and do it did just an amazing job, and I think if they tried to give us more yard it would have actually looked worse, cost us a ton more, and we would have needed special permits to go with a retaining wall above 4 feet. So… good job them.

To expand a little though on my desire to maximize my yard space, here’s the deal – about 2000 square feet of my property is unusable. It sits on top of a giant rock wall. We’re talking two story tall, carved out by glacier during the last ice age, rock. In front of that was dirt that sloped down to my yard, which, despite our best efforts after buying the house, would become overgrown shortly after the start of every spring. So the retaining wall cut back on the slope a decent amount, again giving us some more yard, and we used some of the space as well for an elevated patio and firepit. Again, it looks awesome.

Before
After
And then add a little mulch!

Okay, so now you have the backstory of The Wall… Sorry, no Dharma logo for that.

Now, since I am crazy, I want to utilize every inch I possibly can.

The spot on the left (circled in red) I really can’t do anything about. not only is it sloped, but there’s no real access to the spot because of a big rock to the right of the red circle.

The spot on the right (circled in yellow), however, now that I can probably work with. It has a small incline up from my yard, but nothing too steep. Maybe I can do something there. So I got out my reciprocating saw, and started to cut everything around there that was growing. Then got out my shovel and pick ax and started to dig. I’m now left with a relatively level section of property back there.

My plan is to next slope the back a bit, so it’s not just a steep four foot drop off, then pour stone on top, and then have a shed built there.

The project has definitely had some challenges, like giant rocks that needed to be excavated:

And the amount of smaller stone stone that was pulled out was incredible and used to continue to build up the wall I created around the town property. But overall, the “dig” has been pretty straightforward.

I do have that rock that was pulled out from above sitting in my yard, and will need to do something about that soon.

Overall though I’m pretty happy with the progress.

And because I’m obligated to show off my son, Connor has actually been loving every minute of this project and wants to help at every stage.

WeMo Update

So a while back, a looong while back (since I only post every six months, you know, it was like three posts ago), I wrote about my issues with WeMo. I never really did anything about my problem, because Google did it for me. It’s funny, actually, because my gut instinct when I run into a wall with technology is “I can program something to fix this.” I don’t know if that’s a healthy reaction, but it’s what comes to mind most often. My issue is I have two problems when it comes to programming something:

  1. I never finish anything.
  2. I never have enough time.

So going back to my previous post about WeMo, I wanted to make something that could access my WeMo’s, have a web interface, see stats and graphs of usage, group WeMo devices together for easier control, and have this functionality both inside and outside my house.

Believe it or not, that was about two and a half years ago I posted about this.

Not much has changed, actually. I don’t have a web interface and don’t have better stats and graphs. But what did change is I got a digital assistant – Google. And I learned that much of the other stuff doesn’t matter. Let me explain, but first…

I don’t want this to be a “Google Home is great and wonderful!” type post. The fact is, what I’m doing with it is probably the same that I can do with Alexas. Siri, well, that’s another story. And I think Cortana lost all her lives. But between Big Alexa and Google, I’m pretty sure the feature set is about the same today.

Anywho, what I quickly learned about my Google Home is that it let me do exactly what I wanted as far as grouping. You create “rooms,” and can then add smart devices into it. Here’s the cool thing: you can mix smart devices in a “room,” so for example I can have WeMo outlets, Phillps Hue Bulbs, a Nest Thermostat, and a Chromecast, and Google will interact with them together. It’s really quite nifty.

I use “rooms” in quotes because a room can be pretty much anything. Like I have a “room” called “Christmas Lights,” which consists of WeMo outlets around my house. Then when I ask Google to turn on my Christmas Lights, it’ll turn on the random outlets spread throughout my house.

Changing topic slightly to digital assistants, I recently made a comment (MP3 / YouTube) that was read out on one of my favorite podcasts, DTNS, about how I can include in a room a Google Home device. By doing that, I can now ask that specific Google Home to “turn on the lights,” and Google is smart enough to turn on just the lights in the room it is located in. That’s pretty nifty in my book. I would assume Alexa can do the same thing, I just don’t have familiarity with it. I do have other thoughts about digital assistants, but I’ll post about that at a later time. I’ll try not to wait 6 months!

And finally, I made mention of using a Raspberry Pi to use as a link between my smart home devices and the outside world. The Raspberry Pi would have been ideal because it’s a low-powered device and I would be able to program it like I could create a program for any PC type device. But as it turns out, my needs changed. And I now have a full fledged PC running in my office closet that is used for a Plex server. I’m really excited about this nifty free program, and am looking forward to posting more about it as well in the future.

Brain Indexing

So I haven’t been doing much of sleeping recently. The start of a new school year is almost upon us (albeit delayed slightly due to mold…). So it’s my usual time of the year to stay up late and do all the stuff that needs to get done before children arrive. But tonight I thought I’d get some sleep. Unfortunately after the 5 hours of sleep my body is used to getting, it woke up. At 3am.

Thanks body.

But a strange thing happened when I woke up. I think I caught my brain indexing through life memories. I started to think about childhood friends – you know, the ones you grew up with but lost in touch with in high school, let alone adulthood. I started to think about my best friend from middle school like Onofrio and friends grammer school friends like Kevin, Sal, Marc and Josh. What ever happened to Mike the Ranger fan or Arpan when he moved? Oh gosh and remember Ryan? What ever happened to these people?

If only there was some place where I could go online to catch up with these old friends, see what they’re up to, maybe even see pictures of them and they’re lives they’ve built.

Crap. I just invented Facebook, didn’t I?

Working with Children

Well, it’s been about a year and a half since my last post.  So, time to post again.  Since we last spoke, I’m now a Dad.  And it’s not new either.  March of 2017 he was born.  It amazes me how priorities change.  Yet I’m still doing my side-business plus full time job, which is kinda crazy.  And my side business is doing well, which is great, but makes timing of things difficult.

Hello, my name is Kyle, and I’m a workaholic.

The important thing I found out is to push pause and hang out with the wife and kid.  Time management was something I always wanted to learn, but after all the mathematical equations and talking to Quantum Physicists, it turns out that my only two options are really either clone myself or find a way to slow down the passage of time, while still functioning at the same rate.

I’m close to solving the latter; cloning is just way to complicated.

In any event, that’s it for now.  My almost one year old is asleep so I figured I’d sneak in a quick post before I go be human (shower, get dressed, eat lunch, watch Lost, etc).

WeMo MoWoe

So thanks to the Christmas season, I found myself in the Home Automation market.  And I decided to start with WeMo.  Now please don’t see this as an endorsement of any kind, since there are literally hundreds of products out there that do the same thing, and some may even be much better at it than WeMo.  But for what I was looking for, WeMo did what I wanted and then some.

First, some background:
I like Christmas lights.  A lot.  And by a lot I mean 4,670 of them this year.  That doesn’t include the hundreds inside either (like the ones on the tree, the banister, the little decorative trees and the like).  My problem – not enough electricity on a single outlet.  And because there isn’t enough electricity on a single outlet, I needed a new way to control how they turn on and off if I want to use more than one outlet (which I did!).  I needed something that could do the job with some relatively synchronized timing.  In other words I didn’t want to see half of my lights on and the other half off for 20 minutes.

Enter “Smart Outlets”
So the easiest way I could find to do this was using Smart Outlets.  They all seemed to fit the bill, but WeMo had a couple of legs up for me:

  1. They had an in-wall Smart Switch which I really liked.
  2. They had an easy to use Android app.
  3. The outlets and switches could be automated using sunset and sunrise as conditions.
  4. The outlets could track energy usage.
  5. They have a product called WeMo Maker which lets you create your own WeMo integrations with other devices, like a Garage Door Opener.

So with all that in mind, I set out to WeMo-ify my home.

Setup was pretty simple, although I struggled setting up my first outlet because of some sort of incompatibility between the app and my phone’s WiFi settings or OS.  The trick – turn on Airplane Mode, then turn on WiFi, and then the app worked beautifully.

After I got everything up and running, and I was happy with how it worked, I tried to group the two outlets together… only to find that’s not a thing.  You can group “Smart Bulbs” together, but not outlets.  And while this doesn’t impact me, apparently after you group “Smart Bulbs” together, you can’t control them independently.  That’s a bummer.  But alas, IFTTT to the rescue!  I think…

For those of you not in the know, IFTTT stands for “If This Then That.”  It’s a pretty cool free service since it lets you integrate random networked technologies together to make them do interesting things.  For example, when I open my Smart Garage Door, turn on the Outside Lights.

The problem with IFTTT was similar to my problem with WeMo though, you can’t really group things together, and you can’t string multiple conditions together (or at least I think you can’t – not natively at least).  So for example, I can’t say “When I Open My Garage Door” AND “It’s Before Sunrise” THEN “Turn On Outside Lights.”

Bummer.

To pour salt in the wound, the WeMo outlets I bought, called WeMo Insight Switch (Why do they call them a “switch?”  Could you make it any more confusing?) can track energy usage.  Awesome, right?  No.  Because the app is so anemic in functionality, it can show you some basic stats and email you a CSV file of information on a schedule.  No pretty graphs.  No usage tracking.  Nada.  Lame.


So here’s what I’ve done – thankfully I can use IFTTT to turn everything on with the push of a button on my phone.  I have it set up to turn on all my outlets.  If I buy any more than the current two outlets though, they too will be triggered by this IFTTT button.

Bummer again.

But the WeMo app does let me create a schedule and lets me identify the things I want turned on at sunset (or even a set amount of minutes before or after sunset – nice touch WeMo).  So that’s how I am controlling my two separate Christmas light outlets.


But I want more.

A. I want an interface that’s easily accessible and faster than the WeMo app.
B. I want a web page I can log in to to see and control everything.
C. I want to see more statistics, charts and graphs.
D. I want to be able to group anything together and control it as a group, but still retain the ability to control it individually.
E. I want to be able to do all of this from both inside and outside my house.

Thankfully, I’m a programmer.  And thankfully, WeMo is pretty open to letting people tinker with their stuff, thanks to a system that is pretty much web based that lets you pass commands back and forth using some SOAP and XML.  Now in full disclosure, they have discontinued their SDK, but that was really only for Android and iOS app developers.  They also don’t let you do stuff to WeMo devices remotely – they claim it’s a security risk to their cloud.

The game plan?  Well, it’s still early on, but I think I can use a Raspberry Pi and either home-grown programming or this controller API humorously named ouimeaux to accomplish my dreams.  And if all goes well, this might be something I could actually sell to others, a cloud service perhaps… but lets not get a head of ourselves.

Step one would still be to mess around with ouimeaux and see if I can get it to bend to my will.  Then I would look in to purchasing a Pi and seeing what’s possible.  I would also want to carve out some space on my web server to act as a front-end to all of this, since I wouldn’t want to open up local ports on my router in order to issue commands from outside my WiFi – especially if I begin to market this to others….

We shall see what comes of all of this… probably nothing initially, but it’s definitely a project I’d love to play with.


A New Star Trek – Discovery

So I have just watched the latest trailer for the new Star Trek series that’s coming out in 2017.  If you haven’t seen it yet – here you go:

My initial impression (as is the initial impression of the calm and reasonable folks that make up YouTube commenters) is that… the ship looks god awful.  I mean… I get it – it can’t look too modern and streamlined because it has to fit neatly between certain time periods in the Star Trek universe.

Side note – I initially thought that this was to sit between the Original Series and Next Generation – but that might be off slightly – it may sit between the Original Series and the Original Series movies.

Anyway, getting back to this new ship, the U.S.S. Discovery.  So yeah, I think they did a really bad job on the design of the ship.

But…

I’m so needing a new Star Trek series.  I watched Star Trek Voyager from start to finish.  Then I watched Star Trek Deep Space Nine from start to finish.  I found myself missing it.  I hear the iconic music when the camera pans across the bow of the ship and I get goosebumps.  And I don’t know exactly why – like seriously I don’t get it.  But there’s something that draws me to the series, to the ships, to the characters – that I can’t seem to get enough of.  I can’t wait to see the new movie (which just came out a few days ago), but the movies have a different taste then the series.  The series can build more on the characters and really build great stories that don’t involve the ship blowing up every episode.

So, I will give the poor ship design a pass – I’ll even give the fact that CBS is either planning on burying it on CBS All Access.  Or they feel pretty confident that they will recoup the production costs on new user subscriptions on their streaming platform based on Trek fans flocking to pick up the service.  I just hope it does well enough to continue on for a few years, or spawn something even greater. Please CBS…. please do it right.  Trek fans need this.